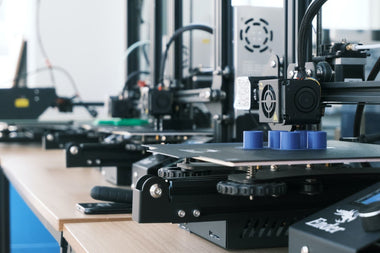


3D Printers and accessories have been phenomenal since they made their entry into the manufacturing space. They started out slowly, being a reserve of the few manufacturers that could afford the technology to become one of the most widespread modeling options around. But despite the great strides that they have made, there are still a few hiccups along the way that people have to contend with from time to time.
We are going to look at troubleshooting tips for 3D Printers, the troubles that may come up, how you can solve them, among other important pieces of information that will help you get the best out of your printer. If you own one of these amazing machines and you have been experiencing all kinds of problems dealing with them, then stick around to the end to find the solutions.
Common 3D Printer Problems
There are a number of 3D printer problems that you are bound to turn into if you are an owner of these machines. Some of these problems are caused by constant usage, and some are simply due to human errors.
Each of the problems outlined below is unique on its own. Some can be solved on the spot with a few changes to the printer, the resin material used, or the software in question. But there are some, especially those that are mechanical, that can only be fixed by an expert. Our focus today is on the issues that affect the process itself, and the following are the most common ones so far.
Printer Working but not Printing

Sometimes the printer is in good condition with all the parts working, except for the fact that every time you try to print something, nothing happens. If you are not careful, this could send you into a frantic search for the problem and you may end up making things worse. It is good to take a step back and examine the possible causes before taking any action. The most common characteristic of this problem is the nozzle running as usual but nothing coming out to the printing table.
- Cause: The most likely problem would be that the printer has run out of filament. Some printers come with alert mechanisms that notify you when the filament has been depleted. But some don’t have this feature. Without checking, you may take too long to finally decipher the problem.
- Solution: If you have run out of filament, then simply load another batch into the extruder and start printing. If the extruder already has filament but still doesn’t work, then try getting rid of that batch and replacing it with a new one. This could be due to some blockage. A replacement should get your machine working within no time.
Nozzle Too Close to the Bed

The nozzle is one of the most important parts of the machine. It is the point where the filament leaves the extruder and is lined on the printing bed in a uniform manner. For this to happen efficiently, the distance between the nozzle and the printing bed has to be spacious enough to allow the nozzle to make free movements. If the nozzle and the printing bed are too close to each other, then no filament will be deposited. And if they do get deposited, there will not be enough space for the nozzle to move around.
- Cause: There’s a possibility that the printing bed has not been adjusted well before the process kicks off. Pushing the two close to each other eliminated room necessary for the melted filament to be deposited correctly and in one line over the other. This could lead to the filament accumulating around the opening of the nozzle, leading to blockage. That will be the end of that printing process.
- Solution: You can deal with this problem in two main ways detailed below.
- You have to offset the Z-Axis by raising the nozzle a little bit. This will increase the distance between the opening of the nozzle and the printing bed. At the same time, caution has to be exercised to not raise the nozzle too high as that will lead to the filament solidifying before hitting the bed, causing serious deformities.
- You can lower the printing bed if your printer allows it. There are some printers that come with fixed beds. However, this is the most problematic fix of the two since you will have to recalibrate the bed to make sure it is level once you have lowered it. A bed that’s not level is another problem that you don't want to deal with.
Over-Extrusion

Over-extrusion is a problem that occurs when the 3D printer takes in more materials than what is needed. This leads to an overproduction of the filament which ultimately leads to over-extrusion. The filament is sprayed sideways outside the line of focus, leading to a deformed model. This could destabilize the structural integrity of the final product, making it heavy in some parts and too thin on others.
- Cause: The main cause of this would be the flow setting being out of sorts. This is what causes the extrusion multiplier to take in more than is needed. A glitch in the software running the printer could be the other culprit behind all this.
- Solution: Check your slicer software for any glitches and problems and correct them immediately. This means stopping the printing process midway to deal with this. Recalibrate the multiplier setting by keying in the right values to avoid a repeat of the same issue. Once you have handled that, check the flow setting and decrease that value to a level that can work with the extrusion multiplier.
Incomplete Fill

This is an issue that leads to the model being printed appearing unfinished and messy due to the incomplete filling. Instead of the filament being laid in the inner parts uniformly, the nizzle starts skipping some parts while overstriding others. This causes holes and gaps to appear all over, and this can cause some serious structural issues that could effectively rule out the item from being ever used in any way or form.
- Cause: There are a lot of reasons that could be the cause of this. It could be due to using a printing bed that is not level. It could also have to do with a slicer operating using the wrong setting. It could also have something to do with the software that’s glitching or a partially blocked nozzle.
- Solution: Start by checking how level the printing bed is. If you notice any slight slanting, recalibrate it correctly. Check the slicer settings and key in the right values to change how the material is being deposited over the printing table. You should also clean out your nozzle to unclog any material that may have blocked it.
Warping

This is a unique problem where the product being printed starts to bend upwards from the very base until it is no longer able to align with the printing bed. This can lead to the model coming unstuck from the bed as the process is still ongoing, causing serious cracks and other deformities that render the product unusable. In some cases, depending on the nature of the material used, the model may even splinter in half due to the stress being applied.
- Cause: The biggest culprit here is the nature of plastic. You may have chosen the wrong materials for your printing princess, and due to changes in the temperature and the bed, the model is unable to handle the stress and starts to warp upwards due to differences in the speed of cooling. The moment the cooling process becomes too fast, the warping sets in.
- Solution: To deal with this, there are some solutions that you can try to make sure the next batch doesn’t suffer the same fate. Firstly, use a heated platform to maintain the high temperature as the printing occurs. This will stop the rapid cooling. Use the right raw material for your process. This should be determined by the type of product you are making. Lastly, calibrate everything to the right parameters, from the slicer to the platform, to ensure the measurements are in the right balance.
Messy First Layer

The success of the 3D printing process depends on the first layer. If that goes wrong, then you might as well scrap that process and begin a new one. The first layer is the foundation, and when that is messed up, everything that follows will continue in the same pattern, leading to a lopsided product that cannot be useful to anyone.
Most of the first layer problems revolve around blurriness in detail, the appearance of unwanted lines as the layer is being laid on the printing bed. You can also get huge blobs popping up due to the nozzle being too close to the bed. Using a non-sticky print material could also lead to this issue.
- Cause: Using a printing bed that is not level enough is the first cause that could lead to a messy first layer. Being the foundation of the entire model makes sure that the end is level before the printing process begins.
- Solution: You should reduce the temperature of the bed gradually as the first layer is being placed to make sure the first layer sticks properly. Increase the distance between the bed and the nozzle to get rid of blurry lines and blobs, and the process will now be smooth.
Elephant’s Foot

Elephant's Foot is a unique problem that is characterized by an extended section of the printed model at the base that looks like a foot. The bulge can give the model an ugly appearance and destabilize it, making it unable to stand straight on any flat surface. This is a defect that is hard to ignore as it affects the functionality of the affected product.
Deformed and Melted Look

A product you are printing coming out with a messed up deformed look that gives it an appearance of something that is half burnt is very common. This is something that first-timers experience all the time. You can see misconfiguration in some layers while other parts of the final product appear slanted and uneven. You will also notice some parts looking like they were melted down into a gooey shape that is barely recognizable, almost like a melted down candle.
- Cause: The biggest cause of this problem is using an overheated hot-ned. If the temperature is not balanced, there's a risk of it going out of control and destroying the material the moment it tries to cool down and solidify. When the heat is too much, the formation of successive layers becomes compromised, and the entire product will become unusable.
- Solution: Begin by balancing out the heat and setting it to a temperature that can work with the material you are dealing with at the moment. To be on the safe side, keep the temperature between 180 - 260 degrees celsius. At the same time, reduce the hot-end temperature by tinkering with the hot-end settings or making direct changes through your software, depending on how advanced it is.
Snapped Filament

The filament material is usually fed into the printer at a constant rate. This is done through a feeding tube that is attached to a roll of plastic material that slowly rolls as the filament is fed into the nozzle. But there are at times where the filament may snap, cutting off the feeding process and interrupting the printing. This is a very common phenomenon in certain types of Bowden printers. Direct feed printers don’t experience much of this since their filament reel is always hidden away from view.
- Cause: The most common cause of this problem is using a cheap filament that snaps easily. There are many types of filament materials that you can use that are very reliable. Once you choose a cheap one, then be ready to deal with constant snapping every time a little pressure is applied to them.
- Solution: When buying filaments for your advanced 3D printer, get the best that money can buy. The two best filament materials are ABS and PLA. They are built for durability, and it would take a lot of deliberate effort for them to snap into two. You should also check the speed at which the filament is being fed into the printer. If it gets too fast,, the chances of things coming apart are very high. The temperature of the filament should also be kept at a constant rate, just enough to melt the filament as it comes in.
Getting Cracks

When making tall objects using any type of 3D printer, there’s always the likelihood of cracks developing. No one is yet to figure out why this always happens but every time you use your printer to make an object that surpasses a certain height, cracks start appearing in the cooling parts. It is hard to notice them during the process, and this is why people get surprised once the cooling has happened and they suddenly notice them.
- Cause: The main culprit here is the cooling process taking place faster than the rate at which the printer can lay new layers. This causes weaknesses in the structure, and the higher the product rises in terms of height, the more pronounced the cracks get. Since the heat is generated by the platform below is insufficient to reach the upper parts, the cracks continue getting worse towards the top as there’s less adhesion up there.
- Solution: Start by increasing the temperature in the extruder by about 10 degrees celsius. This will ensure there’s more heat reaching the upper parts of the model. Each filament product comes with the recommended temperature plastered on the side; use that in your calculations. Maintain the overall temperature of the entire printer within these parameters, and the cracks will not be as bad.
Print Head Missing the Bed

There are times when the printing head that houses the nozzle ends up missing the bed completely and starts laying the layers in the wrong position. This will eventually lead to a deformed product as the alignment will be off all through from the start. Anytime the head misses the printing bed that’s supposed to be laying the lines on, the printer will produce a sound that shows you there’s an error happening that has to be stopped.
- Cause: There are a number of things that can cause this problem. The first one has to do with the misconfiguration of parts. This could be due to a glitch in the software or a misalignment of the nozzle. It is very common in new printers that have not been calibrated yet. Using the wrong printer for the wrong task is also another common cause of this error.
- Solution: Begin by using the correct printers for the right tasks all the time. You should also get into the habit of checking the printer for any misalignment before starting a new printing process. Update your printing software and troubleshoot any problems that may be causing the glitching as soon as you can.
Not Sticking to the Bed

There are many times where you will lose a print because it didn’t stick to the printing bed firmly. This happens when the print is dislodged from the bed while the process is still ongoing, leading to the layering going off the course, causing deformities. If you have never used a printer as often as you may need, this is a problem that you will probably face for the first few attempts, and unless you get it figured out, you may end up wasting resources.
- Cause: The main cause of this issue would be the simple fact that the print is not sticking hard enough on the bed due to a combination of wrong chemicals and wild temperature variations. The success of a 3D printing process is determined by how fast the first layer solidifies while sticking to the bed. Using a bed that’s not level is another common cause of this issue as that will interfere with the nozzle’s ability to evenly spread the layers on each other.
- Solution: Make sure you use the right mix of materials and chemicals that will not make it hard for the layers to stick to the bed. Another quick solution would be to clean the bed before the printing process to get rid of dust which may block the filament from sticking. Heat the platform in advance and apply some glue if all the solutions mentioned above fail.
Visible Infill

In 3D printing, there are several layers that are laid down from the very first foundation. What follows next is a succession of layers that not only align to the first one but creates an intricate network of filament connections that add some structure to the model from the inside. This is called the infill, and in some cases, it can be visible from the outside, giving the final product a very weak and bad appearance.
- Cause: This issue is best known as ghosting in the 3D printing circles, and it is caused by the infill getting too close to the perimeter of the model and eventually running the walls too thin. This causes the infill to overlap the outer walls, which ends up giving the model a see-through appearance that can affect the structural integrity of the entire product.
- Solution: When selecting the values in the software, increase the thickness of the shell to ensure that the infill doesn’t get the chance to overrun the walls no matter how much filament is applied to the layers. This will also have the double advantage of giving the final model a very solid appearance and stronger walls that can withstand anything once the cooling is complete.
Conclusion
3D Printing still has a long way to go, but the far it has reached already is more than enough to completely overhaul how things are made. As the technologies behind 3D printing continue to improve, the chance of these issues popping up will be lesser. If you are looking to know more about 3D printing, then check out our website and have all your questions answered by a team of qualified experts.