


If your Mars printer needs replace B version motherboard, please follow steps below:
Tools you need: Motherboard of Mars, 2.0mm Hex wrench, 2.5mm Hex wrench; Marker pen;
Part One: Disassemble
Step 1: Unscrew the screws that lock the front shell with the 2mm Hex Wrench

Step 2: Gently unplug the cable that connects the motherboard and the touch screen

Step 3: Unscrew the screws that lock the back shell then remove the shell

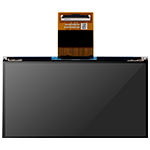
Step 4: Tear off the black tape that fix the LCD cable to the adapter then disconnect the cable

Step 5: Take off the two screws under bottom of the machine that lock the adapter

Step 6: Open the black buckle and take off the adapter


Step 7: Open the black buckles at both sides of the ports and unplug the cable that used to connect the touch screen

Step 8: Mark the ports with numbers as shown in the picture

Step 9: Unplug the ports, unscrew the screws, and take off the old motherboard


Part Two: Reassemble
Step 1: Connect the cable back on to the new board then lock the screws

Step 2: Reinstall the adapter to the port and lock the black buckle


Step 3: Reinstall the two screws that lock the adapter

Step 4: Reconnect the LCD cable to the adapter then apply the black tape to fix the cable


Step 5: Put the back shell back on and lock the screws
Step 6: Reconnect the touch screen cable to the motherboard

Step 7: Put the front shell back on and lock the screws
Instructional Video